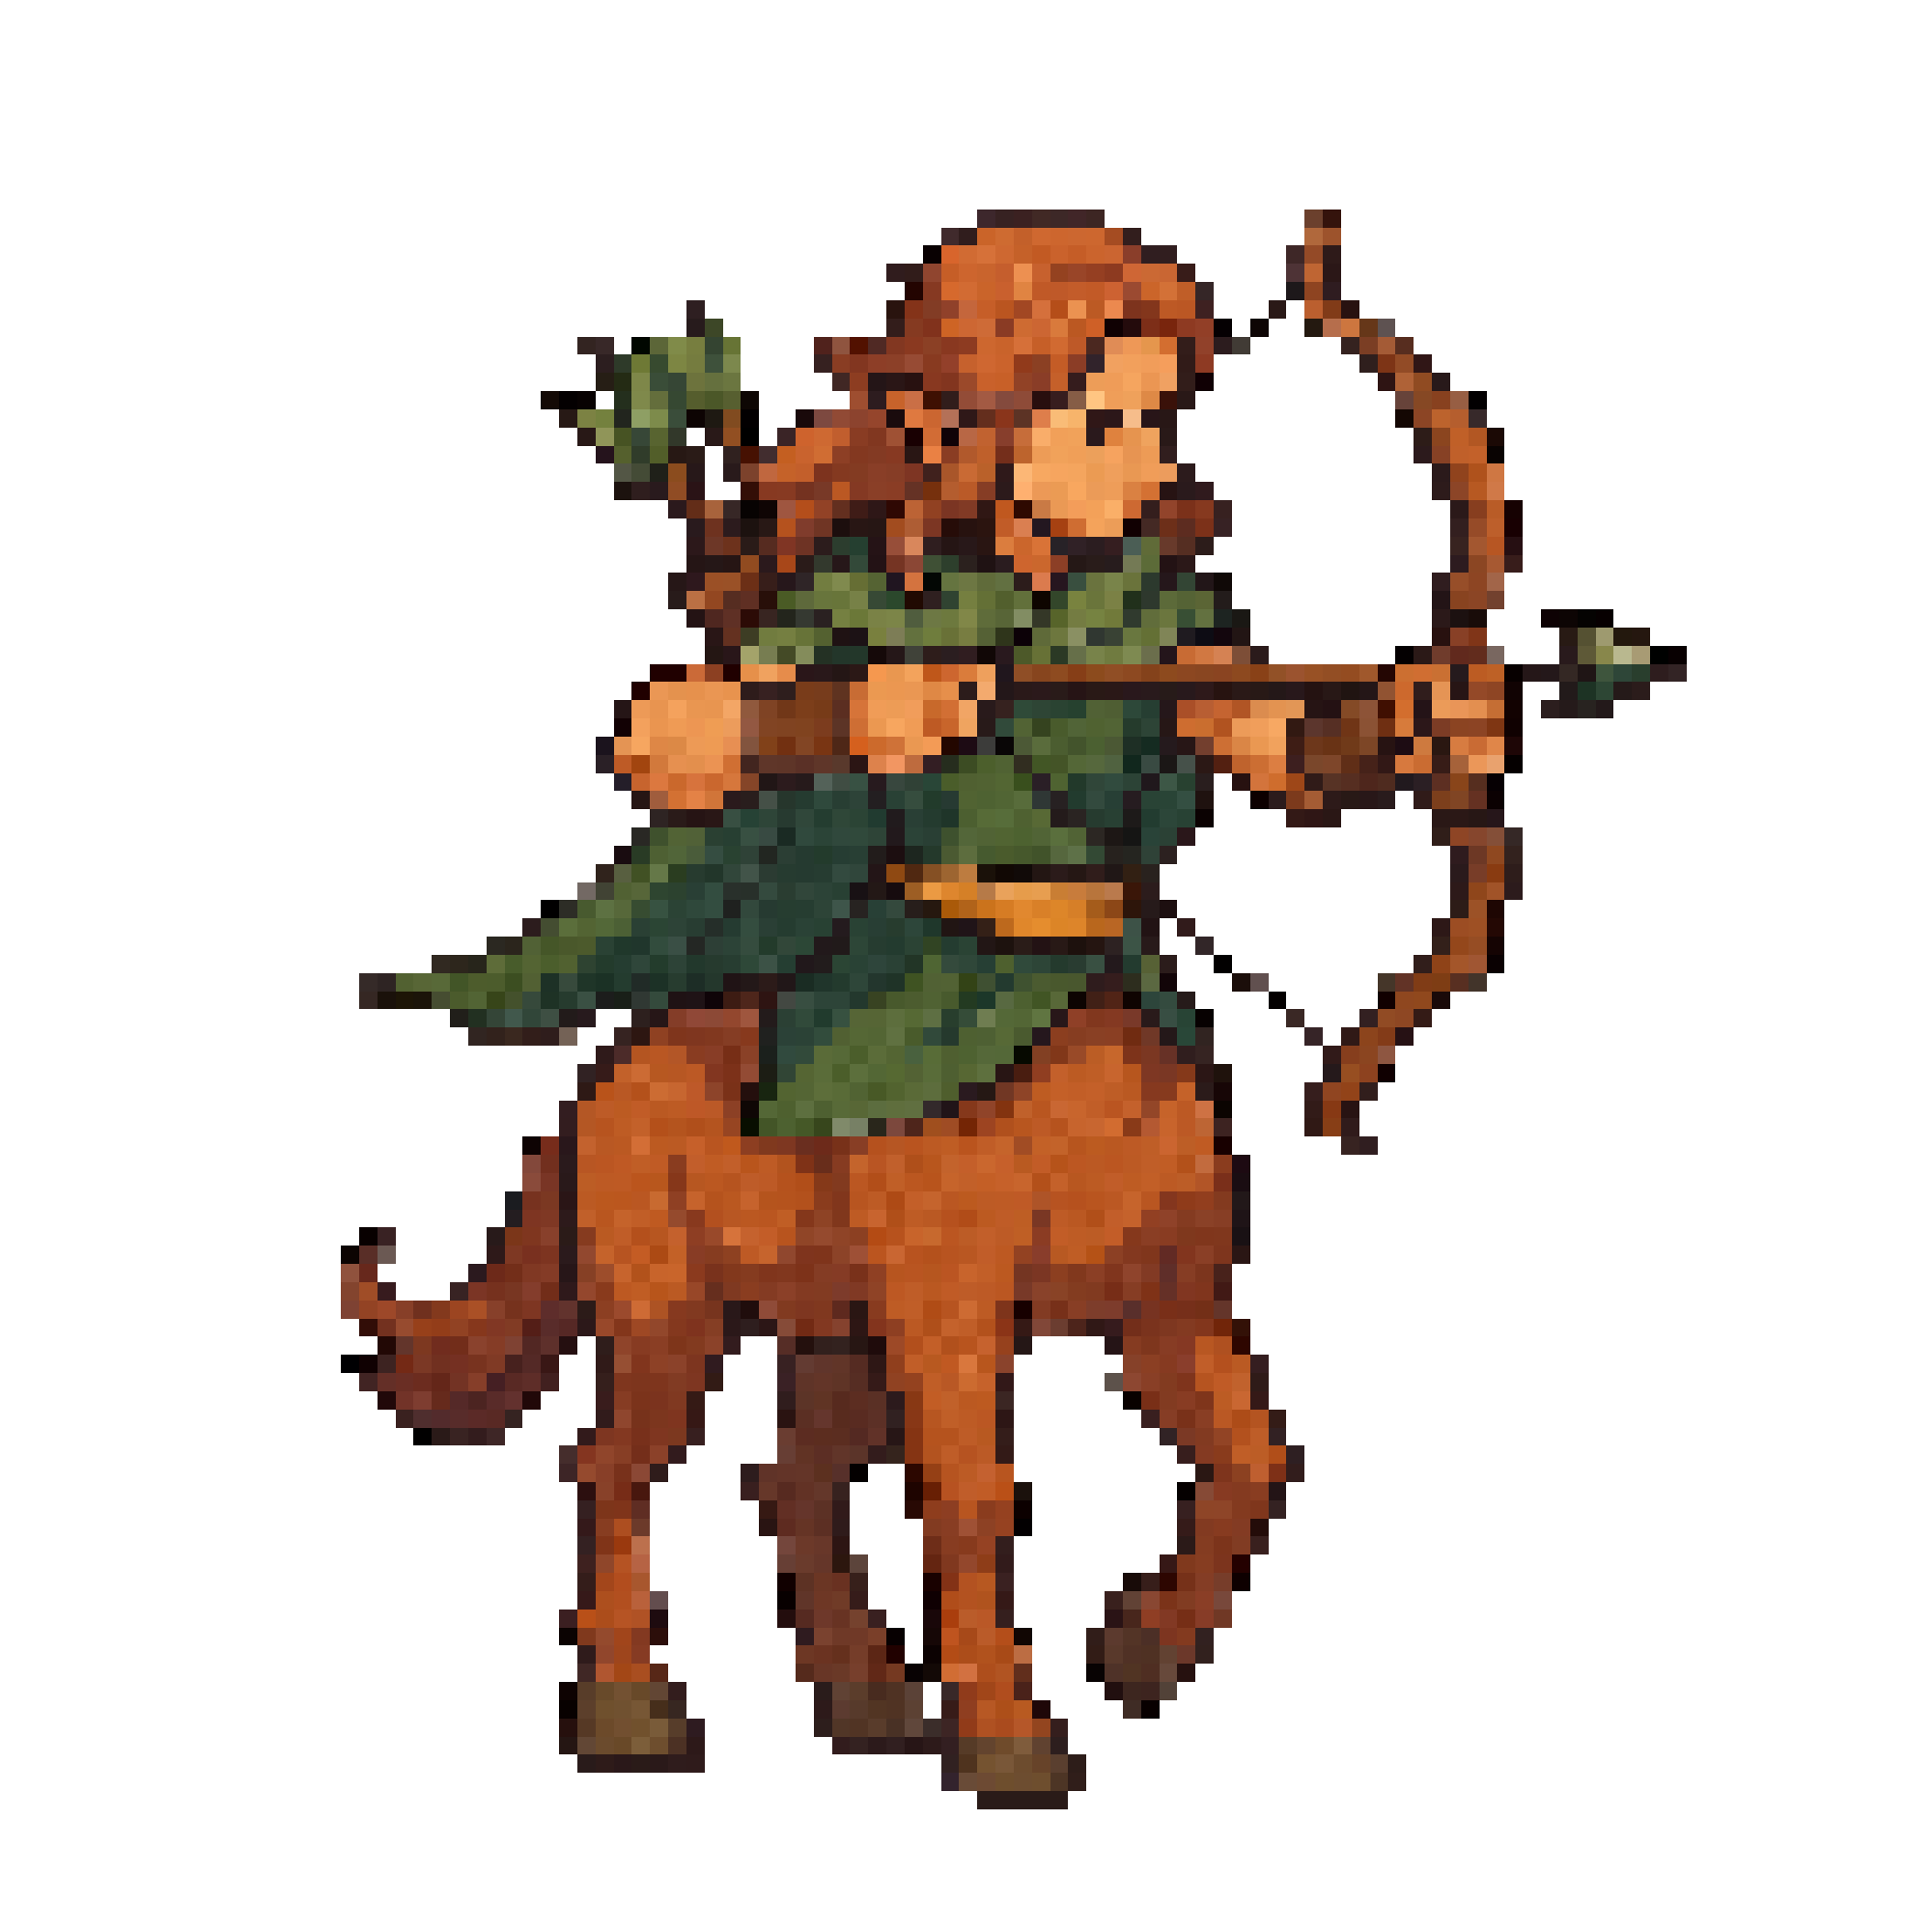
Grove-Warden Centaur (ZONE BOSS)
holy Weak: shadow Lv 8 Zone 1
HP1,637 ATK69 DEF6 EXP500
| Drop | Chance |
|---|---|
| Centaur Heartwood | 100% |
| Grove-Warden's Blessing | 40% |
| Warden Plate Armor | 10% |
| Centaur Greatbow | 8% |
| Centaur's Blessing | 6% |
| Grove-Warden Card | 1% |
Cinder & Crown features 6 zone bosses (one per zone, requires a party of at least 2) and 6 world bosses (group-scale encounters with massive HP pools). This guide covers stats, strategy tips, enrage mechanics, and full loot tables for every boss.
Zone bosses guard the exit of each zone. They use ×3.5 ATK multiplier and ×18–28 HP multiplier relative to zone base stats. Boss fights require a party of at least 2 — boss HP scales with party size (partySize / 5 of maximum).
| Drop | Chance |
|---|---|
| Centaur Heartwood | 100% |
| Grove-Warden's Blessing | 40% |
| Warden Plate Armor | 10% |
| Centaur Greatbow | 8% |
| Centaur's Blessing | 6% |
| Grove-Warden Card | 1% |
Recommended Level: 7–8
Strategy: The Grove-Warden Centaur is the introductory zone boss. Its holy element makes it resistant to shadow attacks — use shadow skills for a significant damage boost. ATK is modest and DEF is low; a straightforward fight for players at the recommended level.
Enrage: At 50% HP, the Grove-Warden enters Warden’s Fury — ATK increases by 30%. Save defensive cooldowns and healing items for this phase.

| Drop | Chance |
|---|---|
| Magma Scale | 100% |
| Saurian Fang | 35% |
| Molten Core | 12% |
| Saurian Greatsword | 8% |
| Saurian Flameheart | 6% |
| Magma Saurian Card | 1% |
Recommended Level: 15–16
Strategy: The Magma Saurian is the first major test of elemental discipline. Its fire element is weak to water — bring water-element skills or weapons. Fire attacks are absorbed outright.
Enrage: At 50% HP, the Magma Saurian activates Molten Core — ATK increases by 30%. Prioritize burst damage to end the fight quickly.

| Drop | Chance |
|---|---|
| Nightmare Fang | 100% |
| Ravager Hide | 30% |
| Nightmare Plate | 10% |
| Ravager Claws | 8% |
| Nightmare Orb | 7% |
| Ravager Card | 1% |
Recommended Level: 23–25
Strategy: The Nightmare Ravager is a shadow-element boss with high ATK. holy skills deal heavy bonus damage and are strongly recommended. Shadow attacks are resisted — avoid them.
Enrage: At 50% HP, the Nightmare Ravager enters Void Frenzy — ATK increases by 30%. Focus DPS to burn it down quickly.

| Drop | Chance |
|---|---|
| Rift Essence | 100% |
| Prowler Fang | 25% |
| Rift Stalker Armor | 10% |
| Dimensional Blade | 8% |
| Rift Essence Stone | 5% |
| Prowler Card | 1% |
Recommended Level: 33–35
Strategy: The Rift Prowler is the first boss with rift mechanics. Its water element is weak to earth. High ATK makes this a dangerous fight — ensure your DEF and HP are well-stocked before engaging.
Enrage: At 50% HP, the Rift Prowler enters Dimensional Collapse — ATK increases by 30%. Save your best cooldowns for this phase.
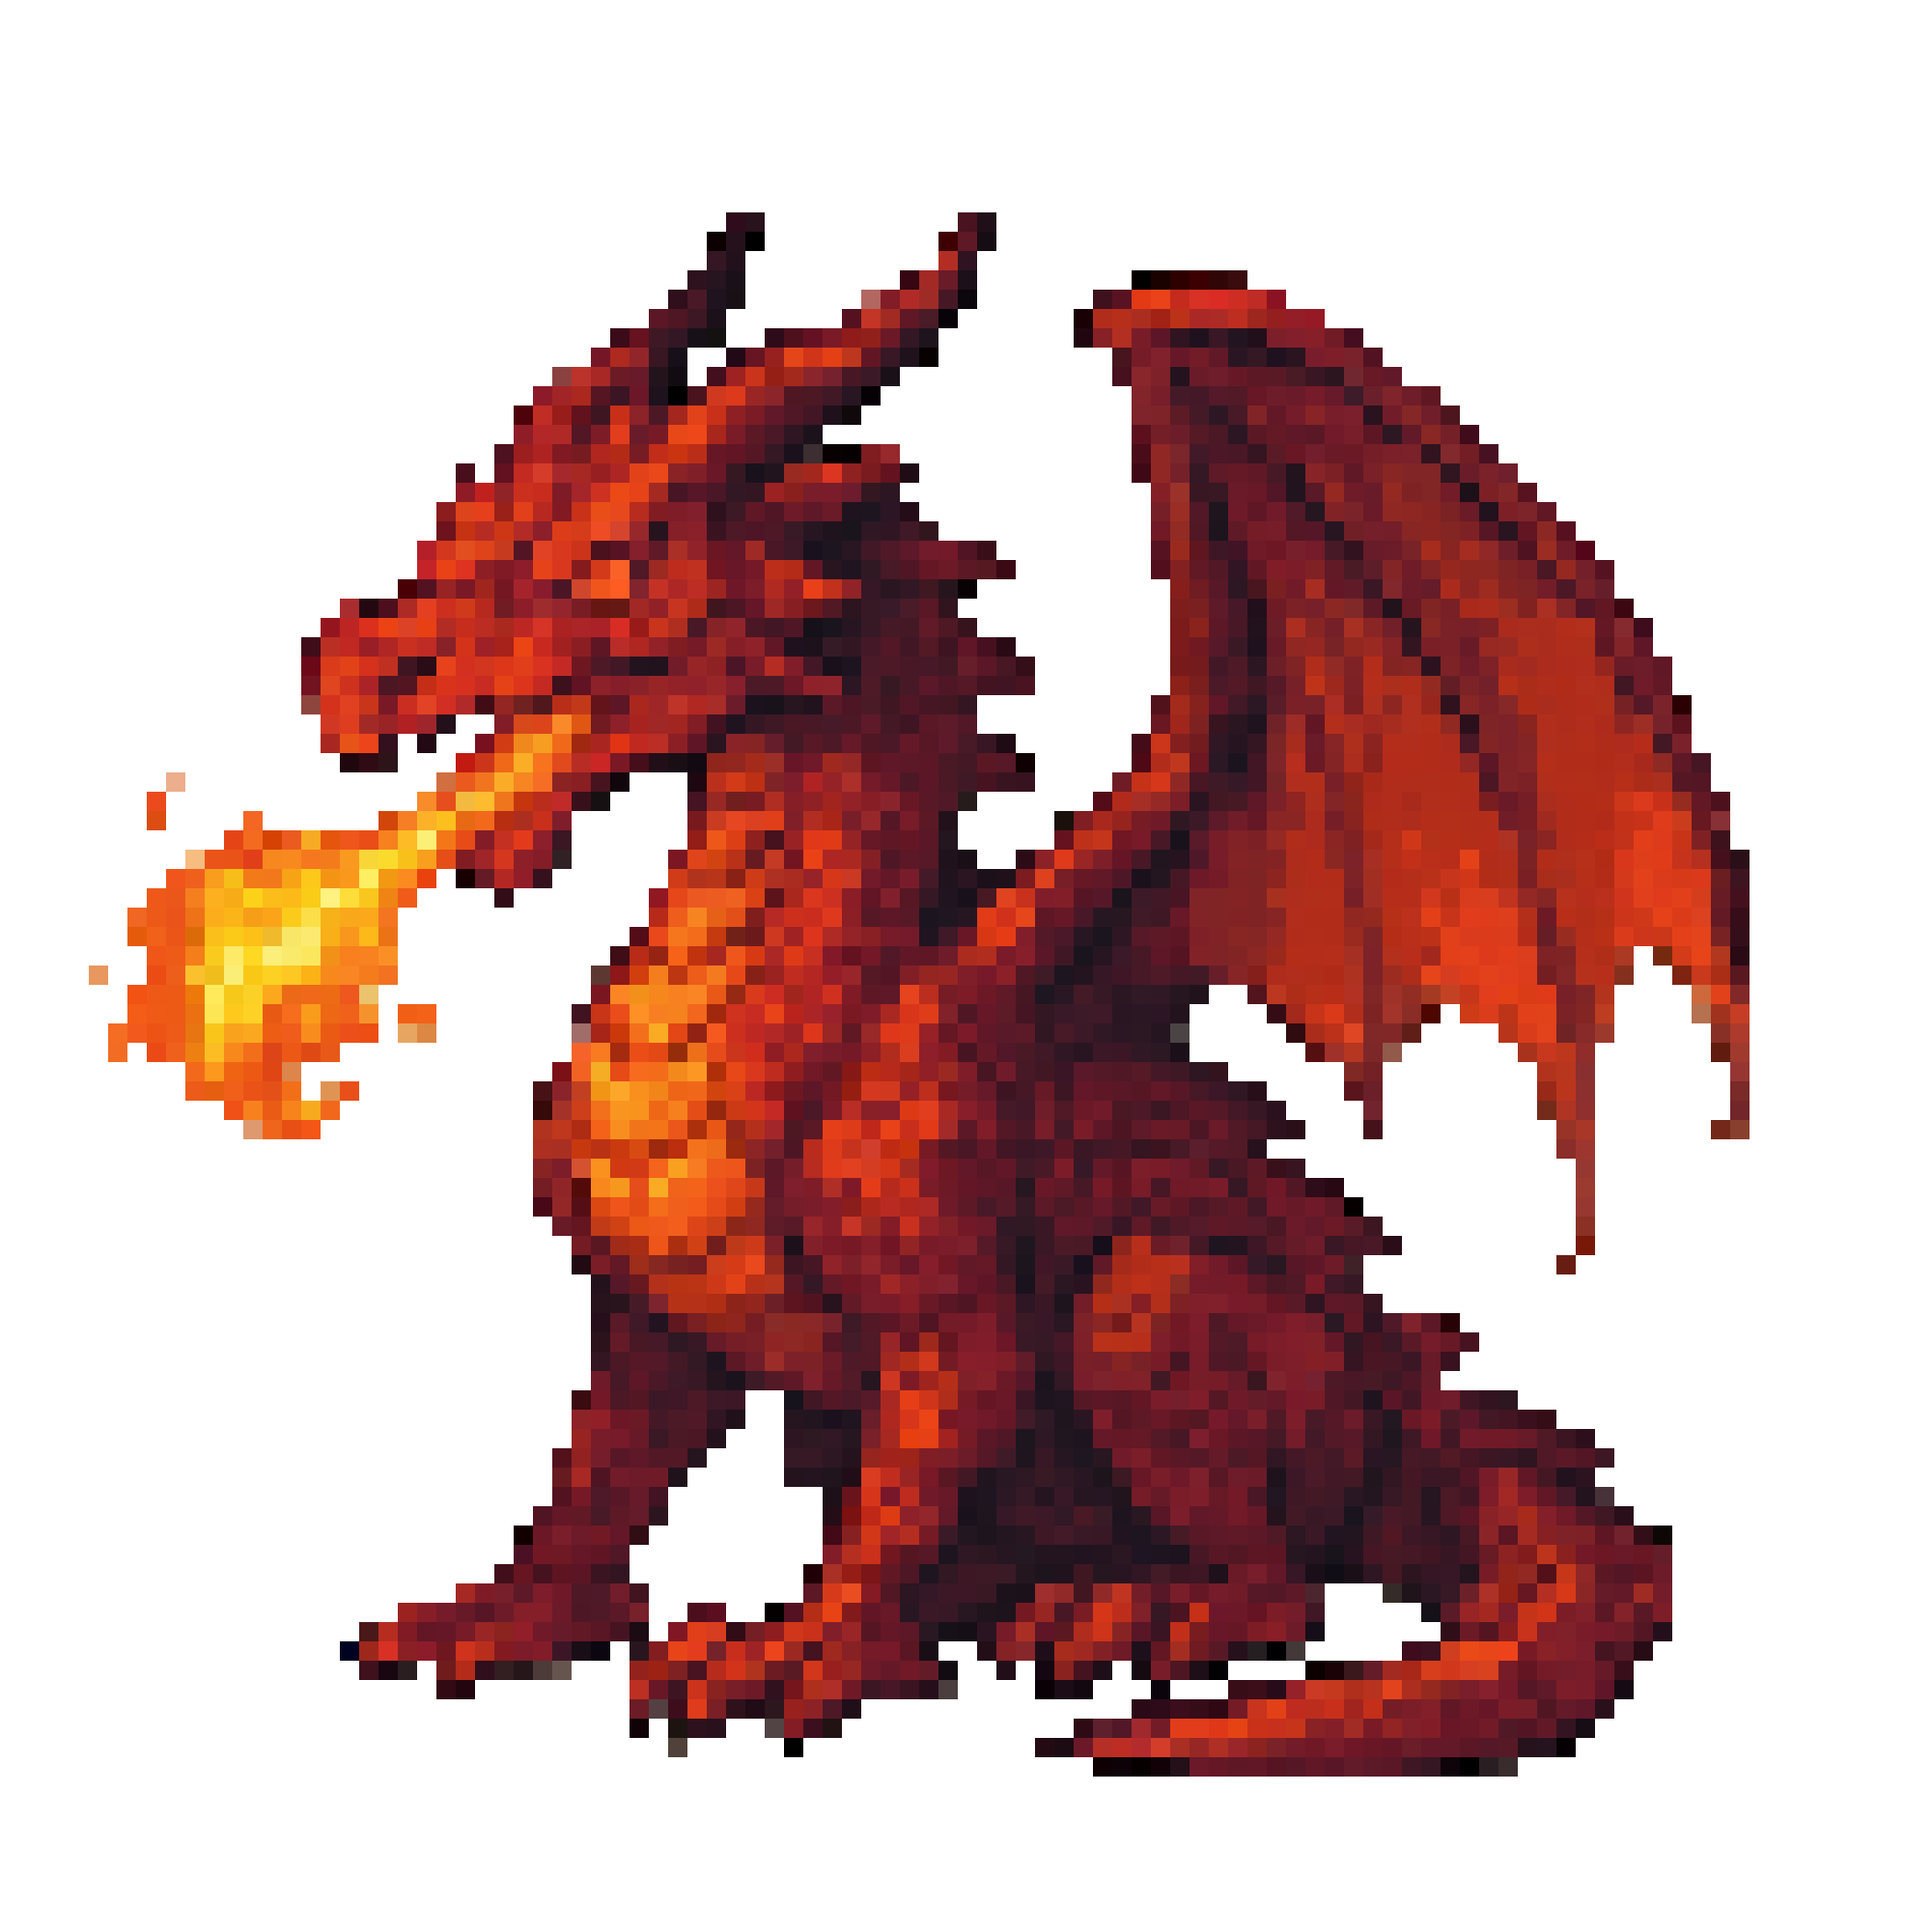
| Drop | Chance |
|---|---|
| Dragon Heart | 100% |
| Inferno Scale | 20% |
| Dragonlord Plate | 10% |
| Inferno Greatsword | 8% |
| Dragon Heart Pendant | 5% |
| Inferno Dragon Card | 1% |
Recommended Level: 43–45
Strategy: The Inferno Dragon is the toughest zone boss before endgame. Its fire element is weak to water — water skills are mandatory. High DEF means physical attackers without elemental advantage will struggle.
Enrage: At 50% HP, Inferno Dragon activates Dragon’s Rage — ATK increases by 30%. Use your strongest cooldowns and consumables immediately.

| Drop | Chance |
|---|---|
| Rift Overlord Core | 100% |
| Void Plate | 15% |
| Dimensional Blade | 8% |
| Rift Overlord Card | 1% |
Recommended Level: 65–70
Strategy: The Rift Overlord is the Zone 6 boss — a brutal endgame encounter with enormous ATK and DEF. holy skills are required to deal meaningful damage. DEF of 225 makes physical attackers without elemental advantage nearly useless.
Enrage: At 50% HP, Rift Overlord enters Rift Collapse — ATK increases by 30%. Keep the party healed and burst it down as fast as possible.
World bosses are open-world encounters designed for large groups. They use ×3 ATK multiplier and ×38–60 HP multiplier, with ×1.8–2.0 DEF multiplier. Their massive HP pools make endurance the primary challenge.
| World Boss | Zone | Level | HP | Element |
|---|---|---|---|---|
| Spiritual Maiden | 1 | 10 | 4,517 | holy |
| Glacial Leviathan | 2 | 20 | 12,380 | water |
| Torch-Bearing Abomination | 3 | 30 | 25,321 | fire |
| Crypt-Lord Malphas | 4 | 40 | 42,160 | shadow |
| High Shaman Grizlok | 5 | 50 | 61,403 | holy |
| The Void Architect | 6 | 80 | 161,431 | shadow |

| Drop | Chance |
|---|---|
| Sacred Tear | 100% |
| Maiden's Grace | 50% |
| Spiritual Vestments | 5% |
| Maiden's Grace Leaf | 7% |
| Maiden Card | 1% |
Recommended Level: 9–10 (group of 3–5)
Strategy: The first world boss. Spiritual Maiden is holy-element — use shadow skills for the elemental advantage. Despite modest HP for a world boss, she requires coordination as she buffs herself periodically.
Enrage: At 50% HP, the Spiritual Maiden enters Divine Ascension — ATK increases by 30%. Assign healers to maintain the group through this phase.

| Drop | Chance |
|---|---|
| Leviathan Scale | 100% |
| Glacial Heart | 35% |
| Leviathan Plate | 12% |
| Frostbite Trident | 8% |
| Leviathan's Tear | 6% |
| Leviathan Card | 1% |
Recommended Level: 18–20 (group of 4–6)
Strategy: A massive sea serpent frozen in Zone 2’s icy caverns. Water element is weak to earth. Keep your party coordinated and prioritize earth-element attacks.
Enrage: At 50% HP, the Leviathan enters Glacial Fury — ATK increases by 30%. Maximize earth DPS to end the fight quickly.

| Drop | Chance |
|---|---|
| Abomination Flame | 100% |
| Cursed Torch | 50% |
| Abomination Plate | 5% |
| Abomination's Skull Charm | 6% |
| Abomination Card | 1% |
Recommended Level: 28–30 (group of 5–8)
Strategy: A grotesque fire-element entity with massive HP. water skills are essential — fire attacks are absorbed. The Abomination’s Torch Slam creates fire zones on the battlefield that deal damage per turn to anyone standing in them.
Enrage: At 50% HP, the Abomination enters Burning Rampage — ATK increases by 30%. Save burst cooldowns for this window.

| Drop | Chance |
|---|---|
| Crypt Lord Phylactery | 100% |
| Malphas' Dark Scepter | 50% |
| Crypt Lord Plate | 5% |
| Malphas' Crown | 5% |
| Malphas Card | 1% |
Recommended Level: 38–40 (group of 6–8)
Strategy: An undead lich-lord commanding shadow energy. holy skills are required for efficient damage. Malphas periodically raises Crypt Servants (undead minions) that buff his stats if left alive.
Enrage: At 50% HP, Malphas enters Lich Form — ATK increases by 30%. Focus holy DPS and kill any servants quickly to prevent stacking buffs.
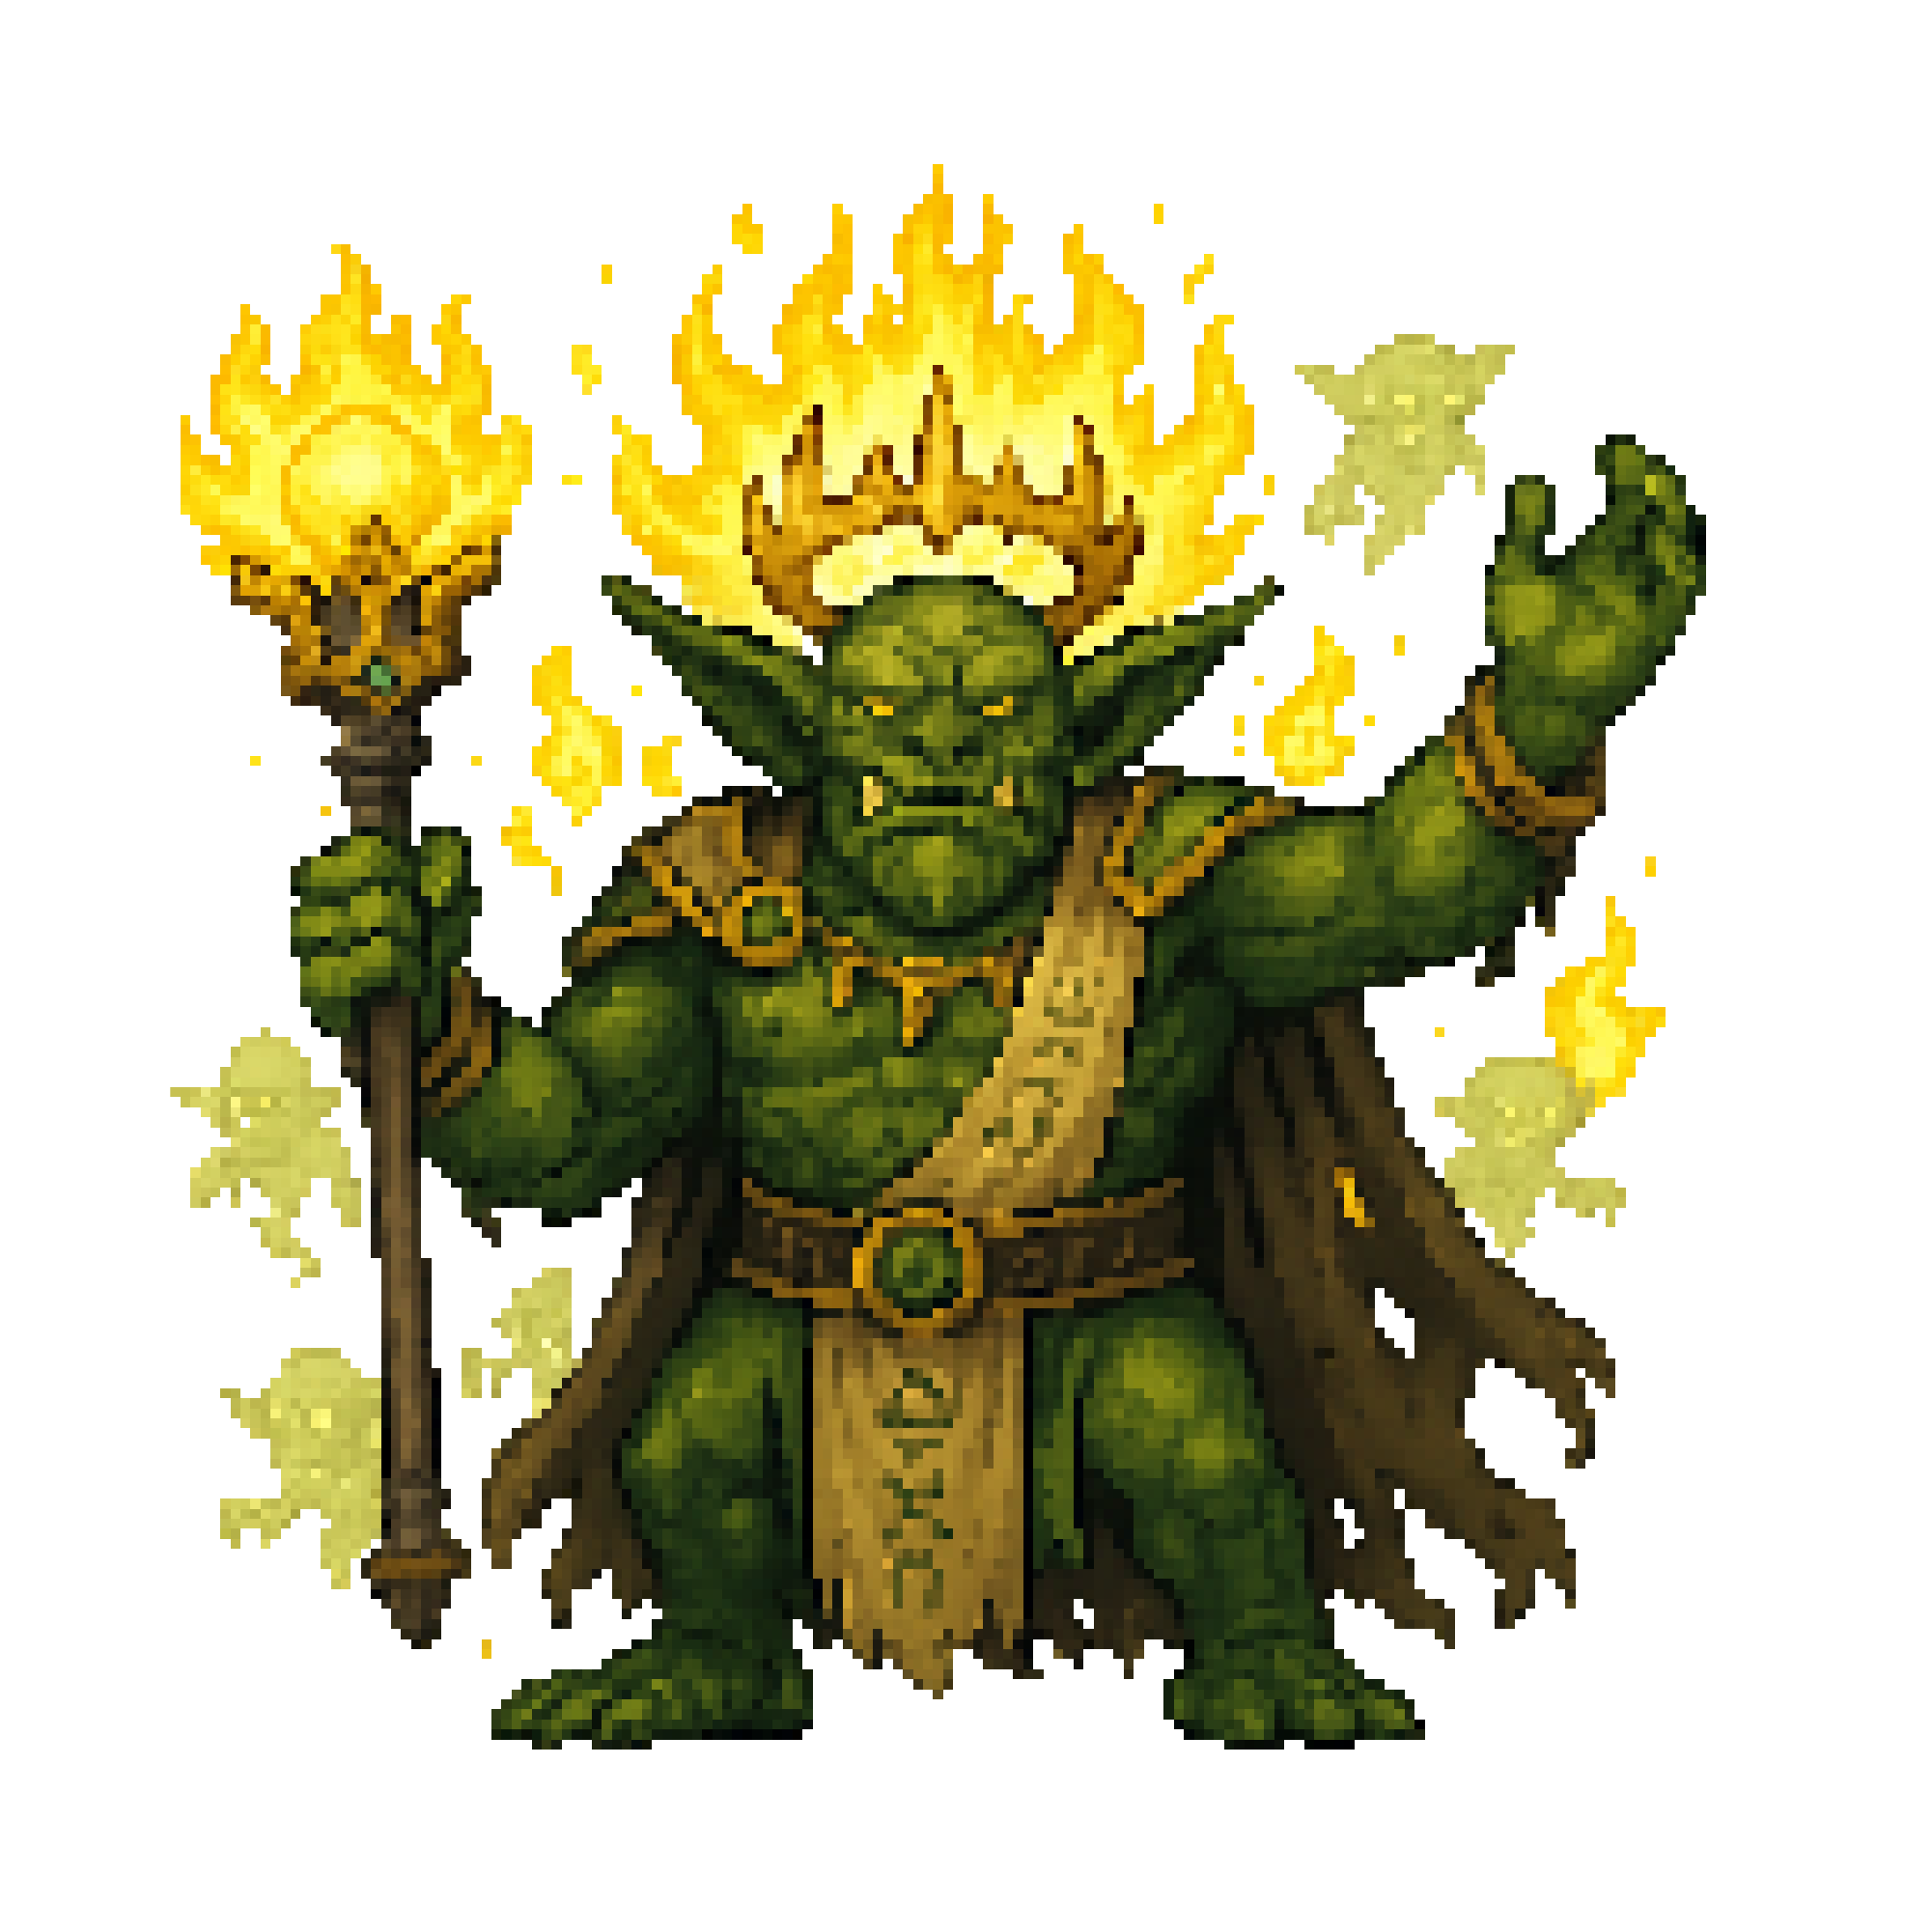
| Drop | Chance |
|---|---|
| Shaman Totem | 100% |
| Grizlok's Hex Staff | 50% |
| Shaman Regalia | 5% |
| Grizlok's Hex Charm | 7% |
| Grizlok Card | 1% |
Recommended Level: 47–50 (group of 8–10)
Strategy: The Zone 5 world boss and a true endurance fight. Grizlok is holy-element — use shadow skills. His Hex Staff ability inflicts random debuffs on party members each turn; having a Sage or White Mage for cleansing is strongly recommended.
Enrage: At 50% HP, Grizlok enters Grand Ritual — ATK increases by 30%. Unload your best abilities and keep the party healed through this phase.

| Drop | Chance |
|---|---|
| Void Architect Fragment | 100% |
| Architect's Dimensional Staff | 50% |
| Void Architect Plate | 5% |
| Architect's Eye | 5% |
| Void Architect Card | 1% |
Recommended Level: 75+ (group of 10–15)
Strategy: The ultimate challenge. With 161k HP and 347 DEF, the Void Architect is designed for the most organized groups. holy is the only viable damage element. Non-holy attacks barely dent its defenses.
Enrage: At 50% HP, The Void Architect enters Dimensional Collapse — ATK increases by 30%. All party members should save their strongest abilities for this phase and finish fast.
| Boss | Zone | Guaranteed Drop | Weapon Drop | Card Drop Rate |
|---|---|---|---|---|
| Grove-Warden Centaur | 1 | Centaur Heartwood | Centaur Greatbow (8%) | 1% |
| Magma Saurian | 2 | Magma Scale | Saurian Greatsword (8%) | 1% |
| Nightmare Ravager | 3 | Nightmare Fang | Ravager Claws (8%) | 1% |
| Rift Prowler | 4 | Rift Essence | Dimensional Blade (8%) | 1% |
| Inferno Dragon | 5 | Dragon Heart | Inferno Greatsword (8%) | 1% |
| Rift Overlord | 6 | Rift Overlord Core | Dimensional Blade (8%) | 1% |
| Boss | Zone | Guaranteed Drop | Special Drop | Card Drop Rate |
|---|---|---|---|---|
| Spiritual Maiden | 1 | Sacred Tear | Spiritual Vestments (5%) | 1% |
| Glacial Leviathan | 2 | Leviathan Scale | Frostbite Trident (8%) | 1% |
| Torch-Bearing Abomination | 3 | Abomination Flame | Abomination Plate (5%) | 1% |
| Crypt-Lord Malphas | 4 | Crypt Lord Phylactery | Crypt Lord Plate (5%) | 1% |
| High Shaman Grizlok | 5 | Shaman Totem | Shaman Regalia (5%) | 1% |
| The Void Architect | 6 | Void Architect Fragment | Void Architect Plate (5%) | 1% |